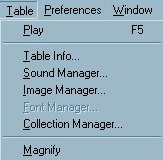
On the Options Bar select Table/Collection Manager...
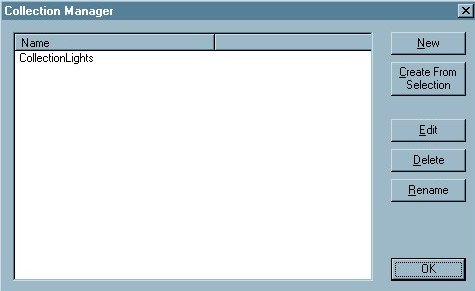
Click Create From Selection
Editor Objects
Making Light Collections with Collection Manager
|
|
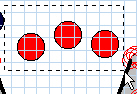
Select a group of Lights you want in the collection |
|
|
On the Options Bar select Table/Collection Manager... |
|
Click Create From Selection |
|
It Creates a collection called Collection1 New - Creates a new Collection Create From Selection - Creates a collection from the objects you have selected. Edit - Opens up the Collection Edit Window. Delete - Deletes selected Collection Rename - Renames Selected Collection
|
| Using DemoLights.zip | |
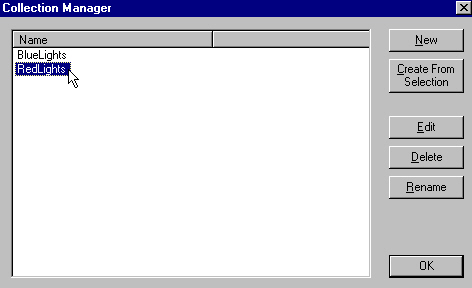 |
There are already 2 collections in the file. From here Select RedLights, & click Edit
|
| Clicking Edit opens up the window below. |
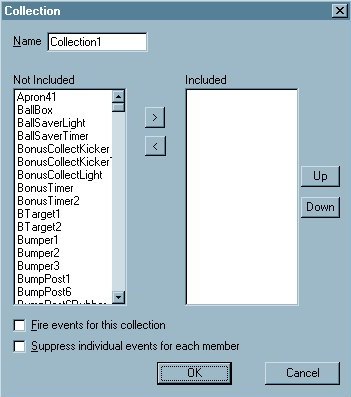 |
Name - Name of the collection to edit. The name is used to address the object through the script. Not Included - List objects not in the collection Included - Lists objects that are in the selected collection. > - Adds objects to the collection. < - Takes objects out of the collection. Up - Moves a selected item up the list. Down - Moves a selected object down the list. Fire Events for this collection - ?? Suppress individual events for each member - of the collection
|
Here is A Visual Pinball Tutorial That demonstrates the script below on Light.State
Script is Green so you know it's script.
Using DemoLights.zip
|
"For Each" support in script! Example. For each light in RedLights Where 'light' is just a temporary name you assign to each element as you use it. This saves the trouble of messing with the size of the collection. Note: These are the Keycodes used in the script from the above demo that change the light states. If keycode = PlungerKey Then If keycode = LeftFlipperKey Then If keycode = RightFlipperKey Then 'States are as followed 0 = LightStateOff so you
can type 0 or LightStateoff '************************* Array LightsArray = Array(Light1,Light2,Light3,Light4,Light5,Light6,Light7,Light8) '************************* Collections ' Collection Using "For Each" support!
'It can also be done like this but the "For
Each" is simpler
Set Red12Lights(0) = r1
|
Editor - Learn the Basics of the Visual Pinball Editor. Menu Bar Functions - Importing Images & Sounds.
Table Options - Ball Color - This explains Table options, importing a ball image & Changing ball color.
Right Click Options - Explains All Right Clicking Options for All Objects.
Building a simple Sling Shot - Learn how to make a slingshot from scratch using a basic wall.
Decals - Explains Decal Options, & shows how to import an image for a decal. Pinball DemoDecal
Plungers & Kickers - How to use a Plungers & Kickers & a Simple Pinball Demo.
Walls & Targets - Explains Walls & Targets. Pinball Demo1
Lights Collections - Learn how to use lights in a collection using collection manager. Pinball DemoLights
Lights & Bumpers - Learning Light & Bumper States & Lights, Bumpers Option Bar. Pinball Demo2
Gate & Sound Events - Explains Gate options & how to use sound events in keyup & keydown. Pinball Demo2
TextBox & Making Score count - Shows you how to use TextBoxes & AddScore & Dim Score. Pinball Demo3
Ramps - Explains Ramp Options & shows you how to build a simple Ramp. Pinball Demo4
Spinners - Explains Spinner Options & shows script to make a spinner work. Pinball Demo4
Triggers - Explains Trigger Options & shows script to make a Trigger work. Pinball Demo5
Timers - Explains Timer Options & shows script to make a Timer work. Pinball Demo6
Flippers - Explains Flipper Options & shows script to make a Flipper work. Pinball Demo7
EMReel - Shows you how to use EMReels. Pinball Demo8