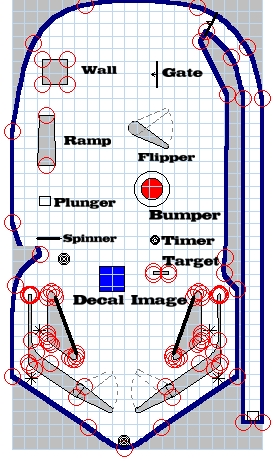
 The Tool
Bar
Editor Objects
Walls & Targets
 The Tool
Bar
The Walls
![]()
Wall Button
 |
|
|
 |
|
First Lets Create a wall:If you don't have a table already opened File / New to open a new Table. |
Click on the wall button | Move Cursor towards the table you are building, it should turn into a wall cursor, click this where you would like your wall placed. | and you get a wall. |
Note:The red circles are called Points. Clicking on them & Dragging will change the wall's shape.
Now that we have a wall Created we can look at the Wall Option Properties.
|
|
 |
| Click on options in the ToolBar | and select the wall by clicking on it. |
doing this will show us the wall properties.
 |
Wall - Name for type of object you have selected. Name - Wall1 The name of the wall, you can change this to whatever you want. Its ok to leave this as the name.Tip I usually only change wall names if I refer to them in the script.The name is used to address the object through the script. -----Colors & Formatting Top Visible Selected by default , the top of the wall is visible. Top Image - Since wall is selected, this would be your top wall's image, after it's imported you would select it from the scroll down list.Note:Wall images can be used from the table image, the table image is usually 512 x 1024 Pixels. Display Image in Editor - If you have an image imported, you would be able to see it inside the wall if you have this box checked.Note: If your editor seems to be running slow, you can uncheck this box so Images don't show in the editor. That should help speed things up a little. Top Color - Clicking this opens the Color Box, from there you can select the top color of your wall. Side Image - Image applied to the side of the wall . Avaible after it's imported . You would select it from the scroll down list.Note:Wall images can be used from the table image. Use a size proportion who is corresponding to the sufface you want to apply.(see also side image tutorial) Side Color - Clicking this opens the Color Box, from there you can select the side color of your wall. Cast Shadow of the wall , checked by default. -----Position Top Height - Changing this number makes your walls top height, higher or lower Default is 50 on any new wall you make. Bottom Height - Changing this number makes your walls bottom height, higher or lower Default is 0 on any new wall you make.Note: making this -1 puts them below the table's surface when dropped, so if can drop is checked and you got the script to go with it. -----State Has Hit Event - This needs to be checked if the wall is scripted to do something. Hit Threshold - The ball has to hit a wall at least this hard in order to register a hit event, the Higher the threshold number, the more power the ball needs behind it before the target will drop. Slingshot Force - The strength of the force the ball will be reflected off the object. Elasticity - The Elasticity of an object, Similar to Slingshot Force. Can Drop - If you have the wall dropping in the script you will need to have this checked. ------Misc Timer Enabled - Unchecked is default. The Timer is off. He can be activated in the script and called by the procedure WallName_Timer() Timer Interval - If enabled will call WallName_Timer() in the script .Unchecked is default. This option defines the time befor the procecedure is started 1000=1 second. UserValue - This Variable is userdefined and can be use for wathever you want. I use it often as event flag in the script.
|
|
Note:Wall 's & Targets are almost the same when making new ones. Differences are:Color, Size/Shape & a Target has a check in it's Has Hit Event box. Targets are even called walls when made, but I usually rename these to Targets, because they are referred to in the script & it makes it easier to remember. |
Editor Objects
Targets
![]()
Target Button
 |
|
|
|
| First Lets Create a Target:If you don't have a table already opened File / New to open a new Table. | Click on the Target button | Move Cursor towards the table you are building ,it should turn into a Target cursor, click this where you would like your wall placed. | and you get a Target. The red circles are called Points. Clicking on them & Dragging will change the Target's shape. |
Now that we have a Target Created we can look at the Target Option Properties.
|
|
|
| Click on options in the ToolBar | and select the Targetby clicking on it. |
doing this will show us the Target properties. Actually shows as Wall
 |
Wall - Name for type of object you have selected. Even though this is a Target. I refer to it as a Target below. Name - Wall1 Changed Name to Target for easier reference & script uses.Tip I usually change all Target names because I refer to them in the script. Ex. Target1, Target2. The name is used to address the object through the script. -----Colors & Formatting -----Colors & Formatting Top Visible Selected by default , the top of the wall is visible. Top Image - Since wall is selected, this would be your top wall's image, after it's imported you would select it from the scroll down list.Note:Wall images can be used from the table image, the table image is usually 512 x 1024 Pixels. Display Image in Editor - If you have an image imported, you would be able to see it inside the wall if you have this box checked.Note: If your editor seems to be running slow, you can uncheck this box so Images don't show in the editor. That should help speed things up a little. Top Color - Clicking this opens the Color Box, from there you can select the top color of your wall. Side Image - Image applied to the side of the wall . Avaible after it's imported . You would select it from the scroll down list.Note:Wall images can be used from the table image. Use a size proportion who is corresponding to the sufface you want to apply.(see also side image tutorial) Side Color - Clicking this opens the Color Box, from there you can select the side color of your wall. Cast Shadow of the wall , checked by default. -----Position Top Height - Changing this number makes your walls top height, higher or lower Default is 50 on any new wall you make. Bottom Height - Changing this number makes your walls bottom height, higher or lower Default is 0 on any new wall you make.Note: making this -1 puts them below the table's surface when dropped, so if can drop is checked and you got the script to go with it. -----State Has Hit Event - This needs to be checked if the wall is scripted to do something. Hit Threshold - The ball has to hit a wall at least this hard in order to register a hit event, the Higher the threshold number, the more power the ball needs behind it before the target will drop. Slingshot Force - The strength of the force the ball will be reflected off the object. Elasticity - The Elasticity of an object, Similar to Slingshot Force. Can Drop - If you have the wall dropping in the script you will need to have this checked. ------Misc Timer Enabled - Unchecked is default. The Timer is off. He can be activated in the script and called by the procedure WallName_Timer() Timer Interval - If enabled will call WallName_Timer() in the script .Unchecked is default. This option defines the time befor the procecedure is started 1000=1 second. UserValue - This Variable is userdefined and can be use for wathever you want. I use it often as event flag in the script. |
|
This is Basic Script for a Target:See demo1targetdrop.zip Script is Green so you know it's script. Sub Target_Hit() 'The Sub for Target, inside the sub is what happens when Target is hit Playsound "targetdropping" 'Plays this
Sound when hit. End Sub Sub Target1_Hit() 'The Sub for Target, inside the
sub is what happens when Target is hit at some point you would wan't your Target to pop back up, it's usually put into a CheckTarget Sub Sub CheckTarget()
See. Targets-BasicTutorial.txt for more info on Targets From the ShivaEngine1_7.zip |
Editor - Learn the Basics of the Visual Pinball Editor. Menu Bar Functions - Importing Images & Sounds.
Table Options - Ball Color - This explains Table options, importing a ball image & Changing ball color.
Right Click Options - Explains All Right Clicking Options for All Objects.
Building a simple Sling Shot - Learn how to make a slingshot from scratch using a basic wall.
Decals - Explains Decal Options, & shows how to import an image for a decal. Pinball DemoDecal
Plungers & Kickers - How to use a Plungers & Kickers & a Simple Pinball Demo.
Walls & Targets - Explains Walls & Targets. Pinball Demo1
Lights Collections - Learn how to use lights in a collection using collection manager. Pinball DemoLights
Lights & Bumpers - Learning Light & Bumper States & Lights, Bumpers Option Bar. Pinball Demo2
Gate & Sound Events - Explains Gate options & how to use sound events in keyup & keydown. Pinball Demo2
TextBox & Making Score count - Shows you how to use TextBoxes & AddScore & Dim Score. Pinball Demo3
Ramps - Explains Ramp Options & shows you how to build a simple Ramp. Pinball Demo4
Spinners - Explains Spinner Options & shows script to make a spinner work. Pinball Demo4
Triggers - Explains Trigger Options & shows script to make a Trigger work. Pinball Demo5
Timers - Explains Timer Options & shows script to make a Timer work. Pinball Demo6
Flippers - Explains Flipper Options & shows script to make a Flipper work. Pinball Demo7
EMReel - Shows you how to use EMReels. Pinball Demo8