Editor Objects
Decal
Decal
Decals are used to place images or text on the Backdrop or Table.
![]()
Decal Button
 |
|
|
 |
| First Lets Create a Decal:If you don't have a table already opened File / New to open a new Table. | Click on the Decal button |
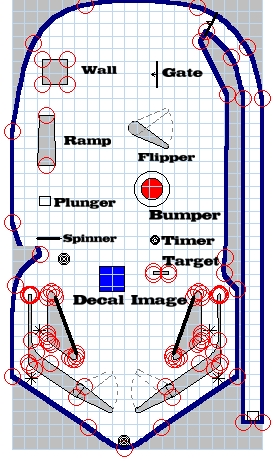
Move Cursor towards the table you are building, it should turn into a Decal cursor, click this where you would like your Decal placed. |
and you get a Decal. |
Doing this will show us the Decal properties.
|
|
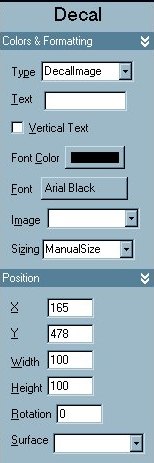
Decal - Name for type of object you have selected. Type - Select DecalImage or DecalText Text - Type the text you would like place in here for DecalText only Vertical Text - Unchecked is Default. Check it to create vertical text. for DecalText only Font Color - Select the color of the Font. for DecalText only Font - Select the Font. for DecalText only Image - Select an image you have imported. for DecalImage only Sizing - Select from: ManualSize, AutoSize, AutoWidth. X - Shows The X position of the Decal on the table. Y - Shows The Y position of the Decal on the table. Width - The Width of the Decal. Height - The Height of the Decal. Rotation - Changes the Angle of the Decal. Surface - Selects a surface for the Decal to be placed on |
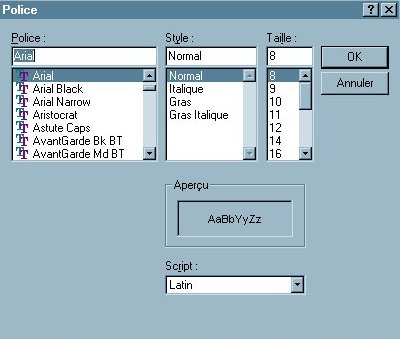 |
Sélectionnez Font ouvre une fenêtre
de sélection du caractère. Notes: Des caractères (font) ttf particuliers au tables de flipper doivent d'abord être installé dans le gestionnaire de caractère de windows ou simplement copier dans le répertoire des font sous windows 98. Sample : affiche une prévisualisation du caractère Script: La propiété d'affichage de caracatère . La langue Latin est correcte pour le français . Note: Cette option n'a rien à avoir avec l'éditeur de script |
This Demo is to show you how to Import an Image for a decal & to show how an image with less pixels then it should have looks distorted.
Using DemoDecal.zip
In this Demo there are 2 Bmp.files supplied. cold1small.bmp is 50x36 pixels & cold1.bmp is 300x215 pixels.
When looking at the demo when it's played you can see the smaller image isn't clear enough.
How To: Importing an image for a Decal
 |
Selecting Table/Image Manager Opens up the Image Manager Box. |
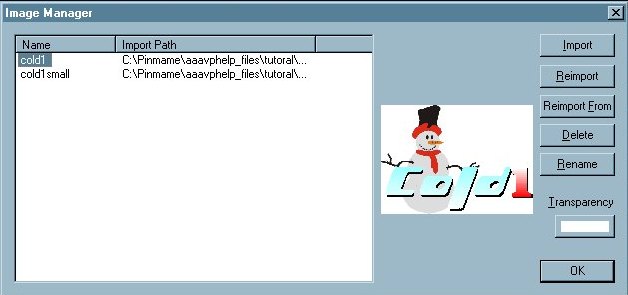 |
Selecting import will open up the next window. Note: The Transparency color, this color you select will be transparent or invisible. Sometimes though when editing in a paint program you may be left with "Freckles" small pixels with color left in them. These will show up on your import , so to make sure you get them all try changing the part you want to be transparent to an odd color 1st, then change them to black or white. DescibesUsing Paint & export as bmp |
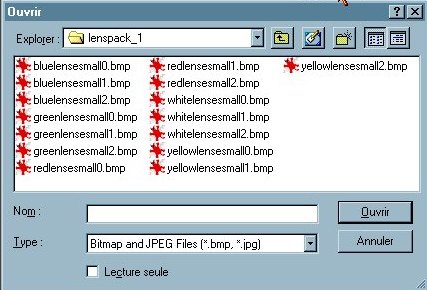 |
From here you would select the image you want to import. Note: Directories will be different on your computer. Once the image is selected it will show up in the Image Manager box. Click OK |
|
|
from here you want to click on the decal & with options opened for the Decal |
 |
Select the Image scroll down menu & select your image. |
Note: Don't forget to select DecalImage type and the Sizing mode to fit the image adequately.
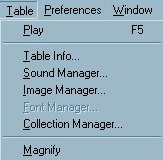
Editor - Learn the Basics of the Visual Pinball Editor. Menu Bar Functions - Importing Images & Sounds.
Table Options - Ball Color - This explains Table options, importing a ball image & Changing ball color.
Right Click Options - Explains All Right Clicking Options for All Objects.
Building a simple Sling Shot - Learn how to make a slingshot from scratch using a basic wall.
Decals - Explains Decal Options, & shows how to import an image for a decal. Pinball DemoDecal
Plungers & Kickers - How to use a Plungers & Kickers & a Simple Pinball Demo.
Walls & Targets - Explains Walls & Targets. Pinball Demo1
Lights Collections - Learn how to use lights in a collection using collection manager. Pinball DemoLights
Lights & Bumpers - Learning Light & Bumper States & Lights, Bumpers Option Bar.Pinball Demo2
Gate & Sound Events - Explains Gate options & how to use sound events in keyup & keydown.Pinball Demo2
TextBox & Making Score count - Shows you how to use TextBoxes & AddScore & Dim Score. Pinball Demo3
Ramps - Explains Ramp Options & shows you how to build a simple Ramp. Pinball Demo4
Spinners - Explains Spinner Options & shows script to make a spinner work. Pinball Demo4
Triggers - Explains Trigger Options & shows script to make a Trigger work. Pinball Demo5
Timers - Explains Timer Options & shows script to make a Timer work. Pinball Demo6
Flippers - Explains Flipper Options & shows script to make a Flipper work. Pinball Demo7
EMReel - Shows you how to use EMReels. Pinball Demo8